前言
一个 AI 方向的朋友因为标数据集发了篇 SCI 论文,看着他标了两个多月的数据集这么辛苦,就想着人工智能都能站在围棋巅峰了,难道不能动动小手为自己标数据吗?查了一下还真有一些能够满足此需求的框架,比如 cvat 、 doccano 、 label studio 等,经过简单的对比后发现还是 label studio 最好用。本文首先介绍了 label studio 的安装过程;然后使用 MMDetection 作为后端人脸检测标记框架,并通过 label studio ml 将 MMDetection 模型封装成 label studio 后端服务,实现数据集的自动标记label studio ml 示例,为自己的 MMDetection 人脸标记模型设计了一种迭代训练方法,使之能够不断随着标记数据的增加而跟进训练,最终实现了模型自动标记数据集、数据集更新迭代训练模型的闭环。
依赖安装
本项目涉及的源码已开源在 label-studio-demo 中,所使用的软件版本如下,其中 MMDetection 的版本及配置参考 MMDetection 使用示例:从入门到出门 :
软件
版本
label-studio
1.6.0
label-studio-ml
1.0.8
label-studio-tools
0.0.1
本文最终项目目录结构如下:
 1
 2
 3
 4
 5
 6
 7
 8
 9
10
11
12
13
14
15
LabelStudio
├── backend         // 后端功能
│   ├── examples    // label studio ml 官方示例(非必须)
│   ├── mmdetection // mmdetection 人脸检测模型
│   ├── model       // label studio ml 生成的后端服务 (自动生成)
│   ├── workdir     // 模型训练时工作目录
│   |   ├── fcos_common_base.pth    // 后端模型基础权重文件
│   |   └── latest.pth              // 后端模型最新权重文件
│   └── runbackend.bat  // 生成并启动后端服务的脚本文件
├── dataset         // 实验所用数据集(非必须)
├── label_studio.sqlite3    // label studio 数据库文件
├── media
│   ├── export
│   └── upload  // 上传的待标记数据集
└── run.bat     // 启动 label studio 的脚本文件(非必须)
label studio 安装启动
label-studio 是一个开源的多媒体数据标注工具(用来提供基本标注功能的GUI),并且可以很方便的将标注结果导出为多种常见的数据格式。其安装方法主要有以下几种:
Docker
1
docker pull heartexlabs/label-studio:latest
pip
1
pip install label-studio
建议是通过 pip 安装,其配置更清晰方便。环境安装完成后在任意位置打开命令行,使用以下命令启动 label studio :
1
label-studio --data-dir LabelStudio -p 80
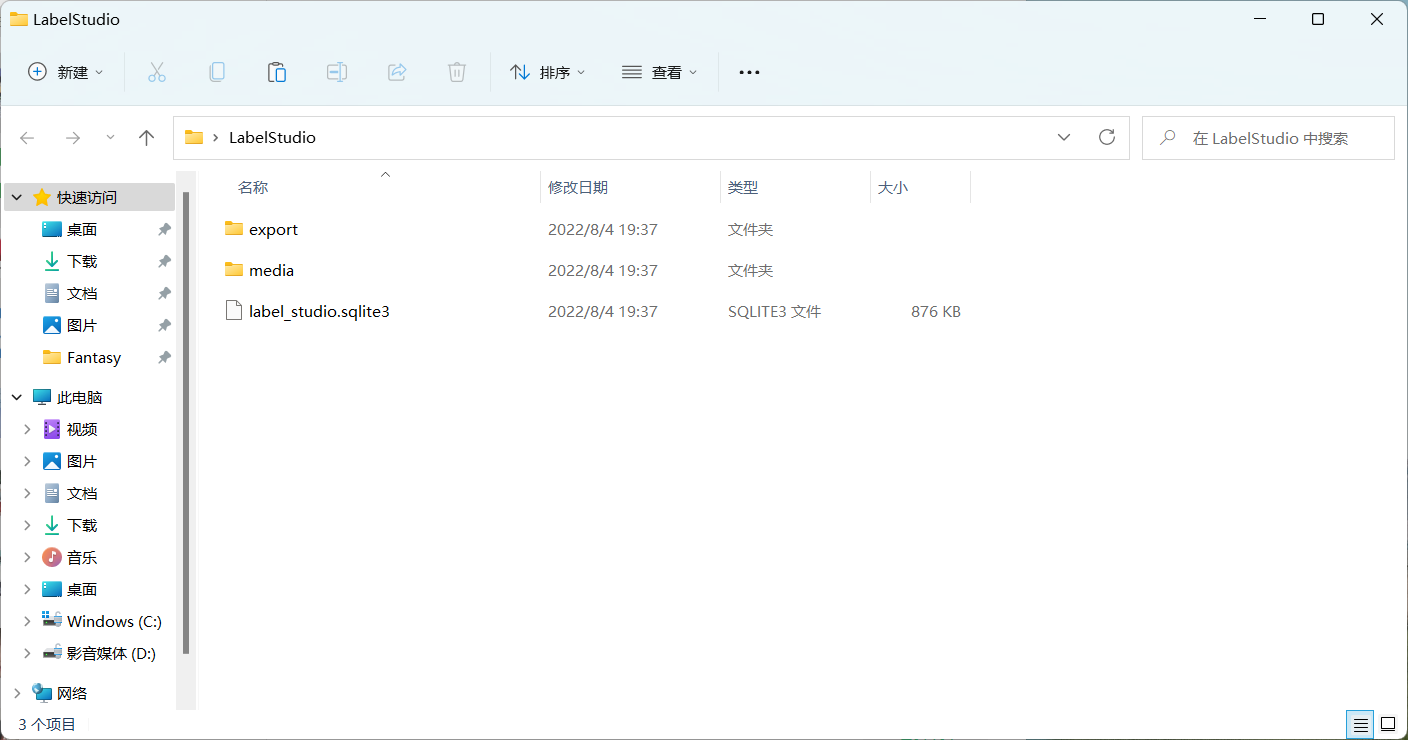
其中 --data-dir 用于指定工作目录, -p 用来指定运行端口,运行成功后会当前目录会生成 LabelStudio 目录:
label-studio 初始化
工作界面
label studio ml 安装
label studio ml 是 label studio 的后端配置,其主要提供了一种能够快速将AI模型封装为 label studio 可使用的预标记服务(提供模型预测服务)。其安装方法有以下几种:
GitHub 安装
1
2
3
git clone https://github.com/heartexlabs/label-studio-ml-backend
cd label-studio-ml-backend
pip install -U -e .
pip 安装:
1
pip install label-studio-ml
仍然建议通过 pip 安装,GitHub 安装可能会有依赖问题。安装完成后使用 label-studio-ml -h 命令检查是否安装成功。
前端配置
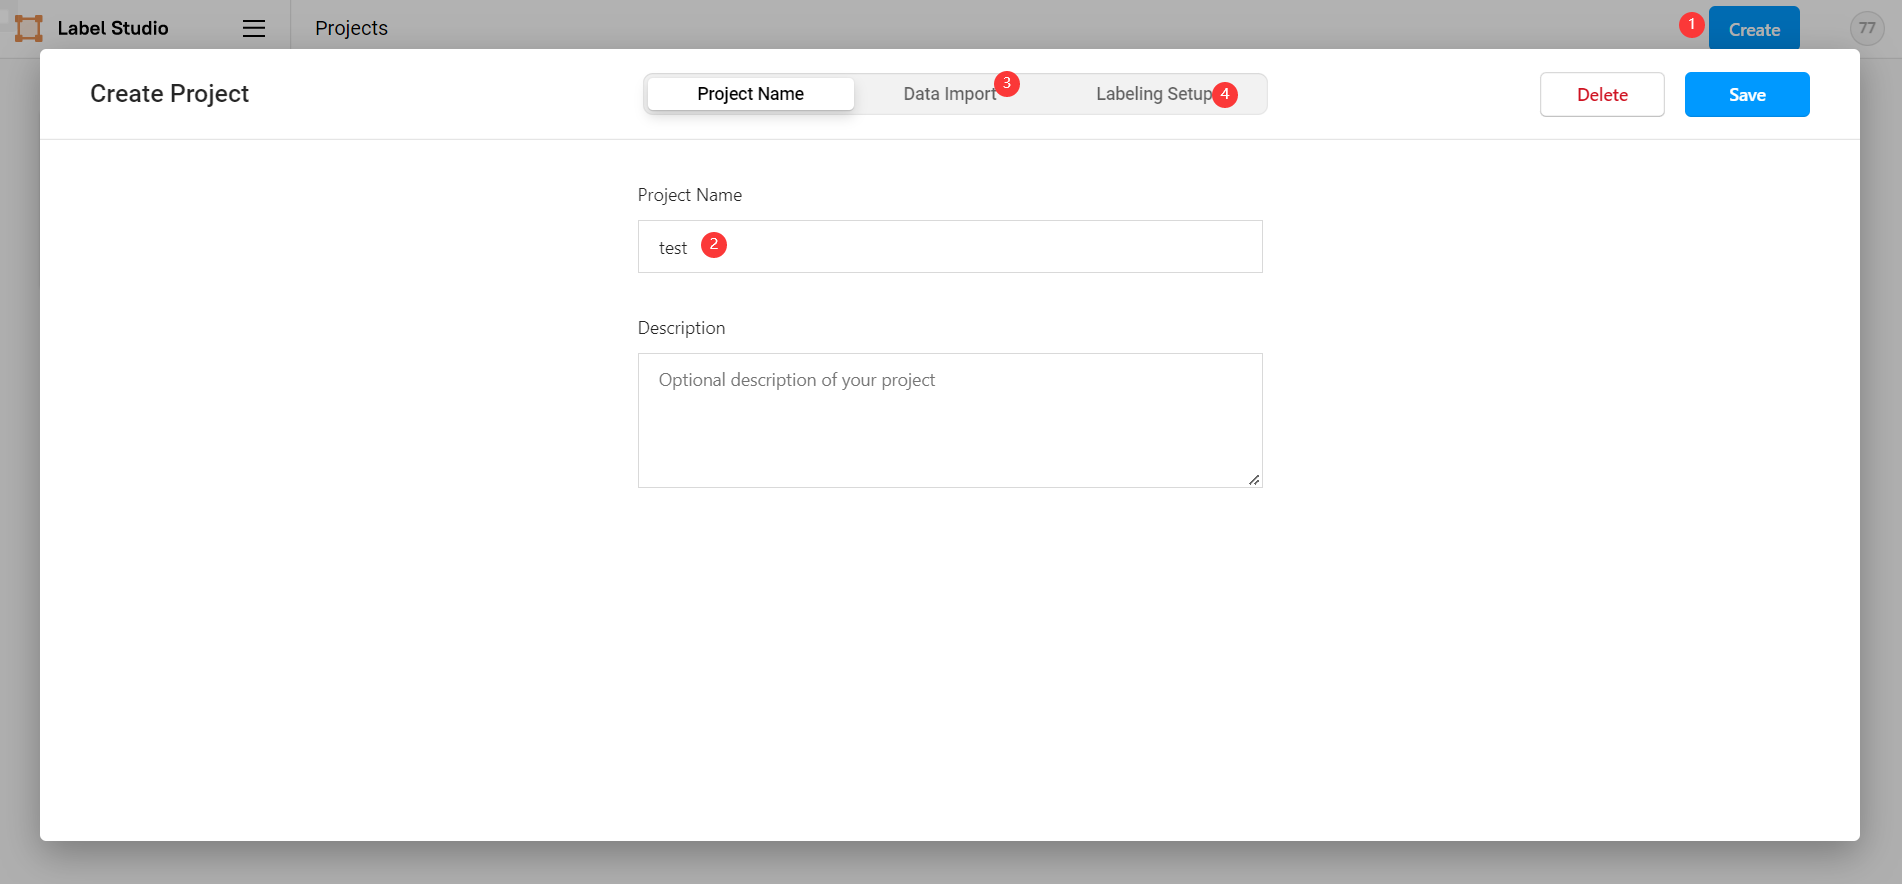
在 label studio 前端主页中选择创建项目:
项目基本信息
创建项目1
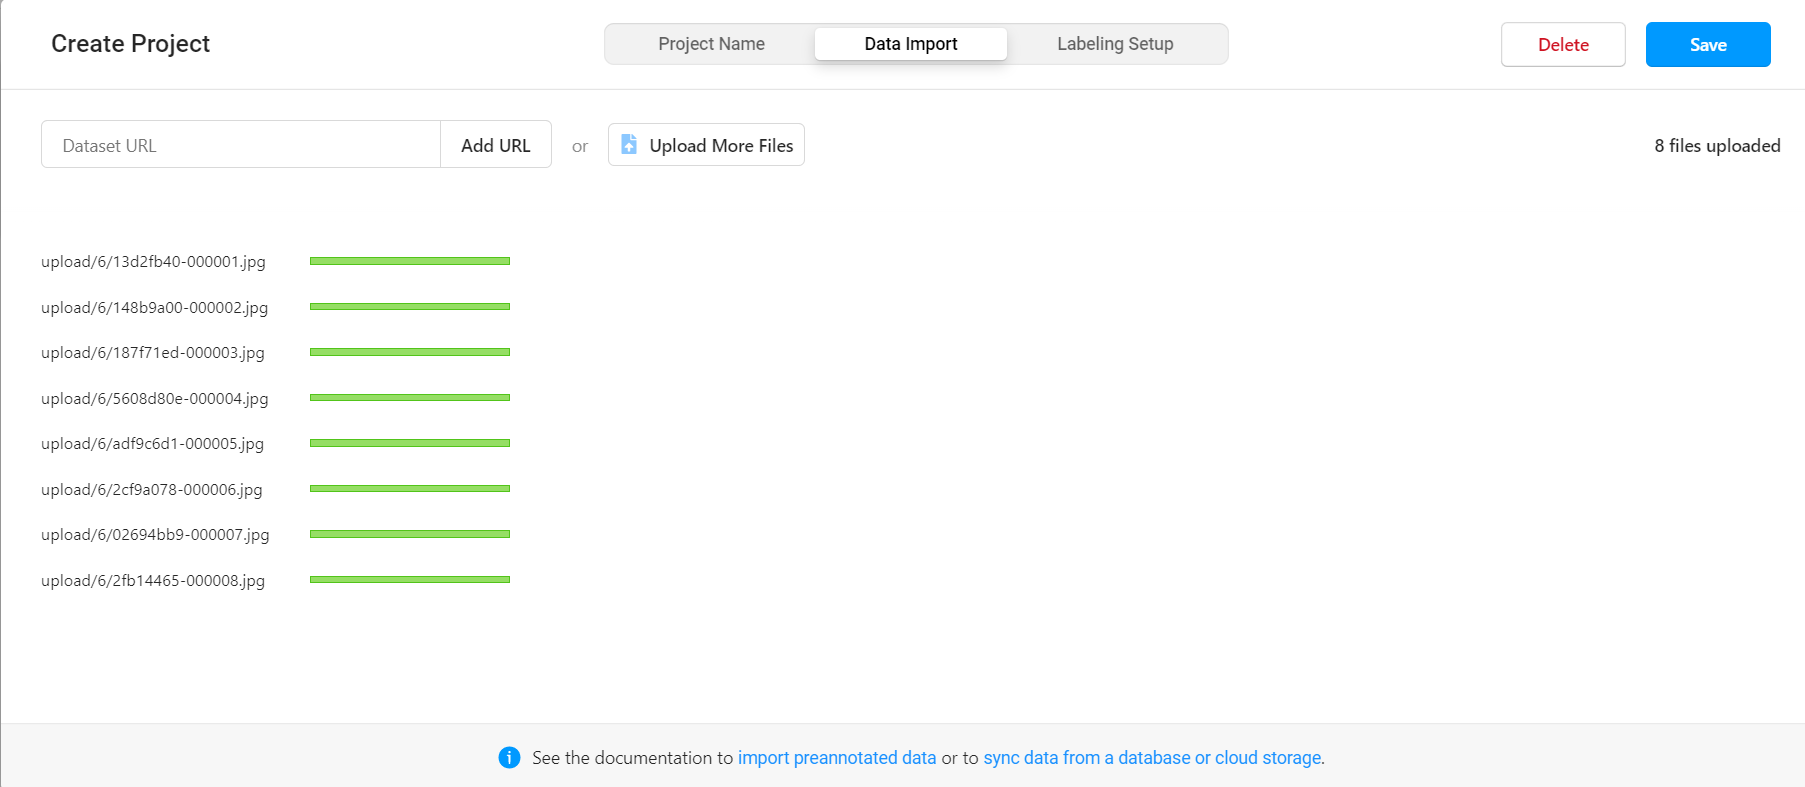
导入数据
创建项目2
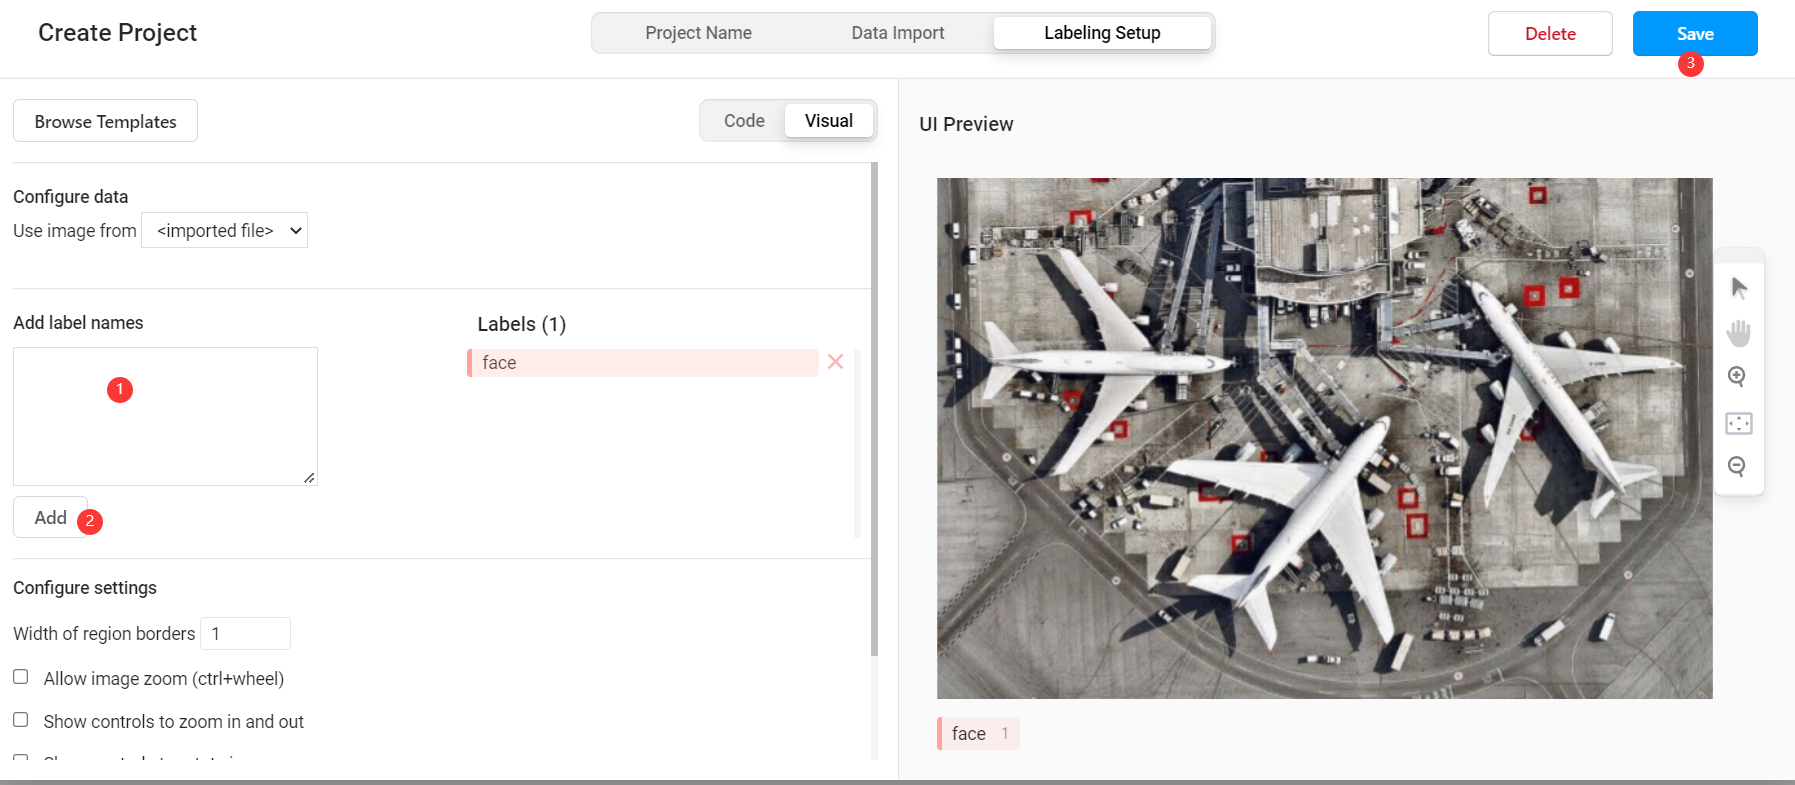
选择标记模板
创建项目3
此时我们已经可以通过 label studio 进行普通的图片标记工作,如果要使用其提供的辅助预标记功能,则需要进行后续配置。
后端配置
选取后端模型
在 MMDetection 使用示例:从入门到出门 中,我们已经完成了基于 celeba100 数据集的人脸检测模型的训练,本文将直接使用其中训练的结果模型。
后端服务实现
引入后端模型
在根目录下创建 backend 目录,并将 MMDetection 使用示例:从入门到出门 中的整个项目文件复制其中,此时项目目录为:
 1
 2
 3
 4
 5
 6
 7
 8
 9
10
11
12
13
14
15
16
17
18
19
20
.
├── backend
│   └── mmdetection             // 复制的 mmdetection 文件夹
│        ├── checkpoints
│        ├── completion.json
│        ├── configs
│        ├── conf.yaml
│        ├── detect.py
│        ├── label_studio_backend.py      // 需要自己实现的后端模型
│        ├── mmdet
│        ├── model
│        ├── test.py
│        ├── tools
│        └── train.py
├── dataset
├── export
├── label-studio-ml-backend
├── label_studio.sqlite3
├── media
└── run.bat
创建后端模型
label studio 的后端模型有自己固定的写法,只要继承 label_studio_ml.model.LabelStudioMLBase 类并实现其中的接口都可以作为 label studio 的后端服务。在 mmdetection 文件夹下创建 label_studio_backend.py 文件,然后在文件中引入通用配置:
 1
 2
 3
 4
 5
 6
 7
 8
 9
10
11
12
13
14
15
ROOT = os . path . join ( os . path . dirname ( __file__ ))
print ( '=> ROOT = ' , ROOT )
# label-studio 启动的前端服务地址
os . environ [ 'HOSTNAME' ] = 'http://localhost:80'
# label-studio 中对应用户的 API_KEY
os . environ [ 'API_KEY' ] = '37edbb42f1b3a73376548ea6c4bc7b3805d63453'
HOSTNAME = get_env ( 'HOSTNAME' )
API_KEY = get_env ( 'API_KEY' )
print ( '=> LABEL STUDIO HOSTNAME = ' , HOSTNAME )
if not API_KEY :
print ( '=> WARNING! API_KEY is not set' )
with open ( os . path . join ( ROOT , "conf.yaml" ), errors = 'ignore' ) as f :
conf = yaml . safe_load ( f )
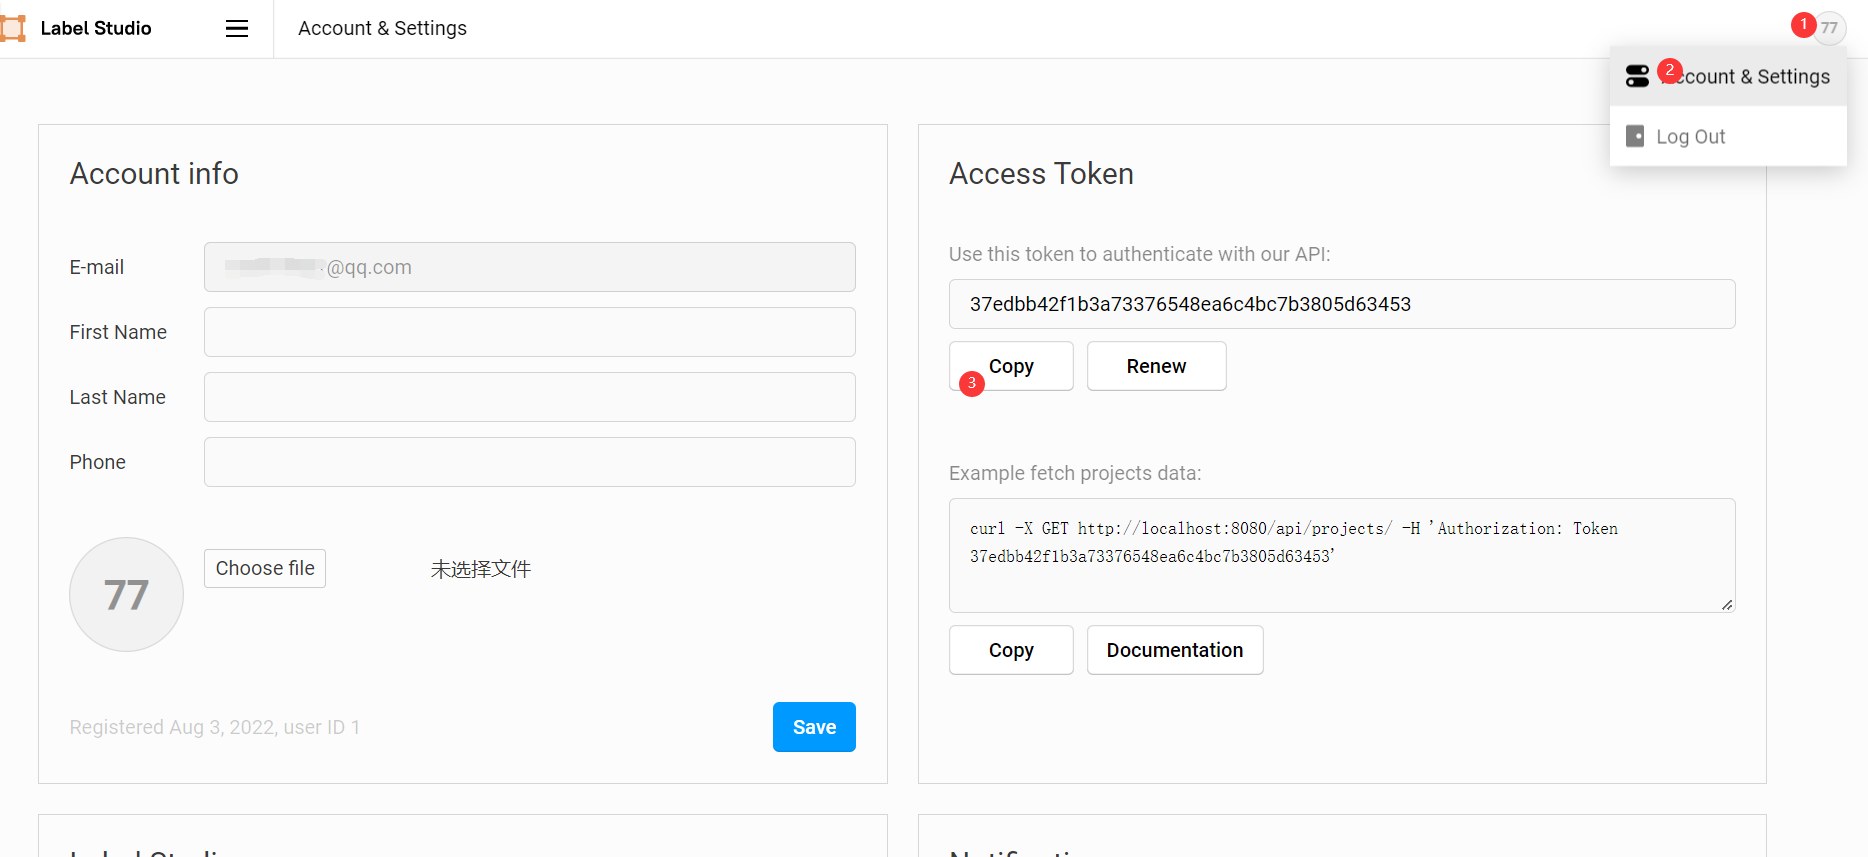
这里的 API_KEY 可以在前端的 Account & Settings 中找到。
API_KEY
label_studio_ml.model.LabelStudioMLBase 并实现关键方法,不同方法对应不同功能,后面会陆续实现:
1
2
3
4
5
6
7
8
9
class MyModel ( LabelStudioMLBase ):
def __init__ ( self , ** kwargs ):
pass
def predict ( self , tasks , ** kwargs ):
pass
def fit ( self , completions , batch_size = 32 , num_epochs = 5 , ** kwargs ):
pass
def gen_train_data ( self , project_id ):
pass
完成其中的 __init__ 方法,以实现模型初始化功能(必须):
 1
 2
 3
 4
 5
 6
 7
 8
 9
10
11
12
13
def __init__ ( self , ** kwargs ):
super ( MyModel , self ) . __init__ ( ** kwargs )
# 按 mmdetection 的方式加载模型及权重
if self . train_output :
self . detector = init_detector ( conf [ 'config_file' ], self . train_output [ 'model_path' ], device = conf [ 'device' ])
else :
self . detector = init_detector ( conf [ 'config_file' ], conf [ 'checkpoint_file' ], device = conf [ 'device' ])
# 获取后端模型标签列表
self . CLASSES = self . detector . CLASSES
# 前端配置的标签列表
self . labels_in_config = set ( self . labels_in_config )
# 一些项目相关常量
self . from_name , self . to_name , self . value , self . labels_in_config = get_single_tag_keys ( self . parsed_label_config , 'RectangleLabels' , 'Image' ) # 前端获取任务属性
完成其中的 predict 方法,以实现预标记模型的标记功能(必须):
 1
 2
 3
 4
 5
 6
 7
 8
 9
10
11
12
13
14
15
16
17
18
19
20
21
22
23
24
25
26
27
28
29
30
31
32
33
34
35
36
37
38
39
40
41
42
43
def predict ( self , tasks , ** kwargs ):
# 获取待标记图片
images = [ get_local_path ( task [ 'data' ][ self . value ], hostname = HOSTNAME , access_token = API_KEY ) for task in tasks ]
for image_path in images :
w , h = get_image_size ( image_path )
# 推理演示图像
img = mmcv . imread ( image_path )
# 以 mmdetection 的方法进行推理
result = inference_detector ( self . detector , img )
# 手动获取标记框位置
bboxes = np . vstack ( result )
# 手动获取推理结果标签
labels = [ np . full ( bbox . shape [ 0 ], i , dtype = np . int32 ) for i , bbox in enumerate ( result )]
labels = np . concatenate ( labels )
# 推理分数 FCOS算法结果会多出来两个分数极低的检测框,需要将其过滤掉
scores = bboxes [:, - 1 ]
score_thr = 0.3
inds = scores > score_thr
bboxes = bboxes [ inds , :]
labels = labels [ inds ]
results = [] # results需要放在list中再返回
for id , bbox in enumerate ( bboxes ):
label = self . CLASSES [ labels [ id ]]
if label not in self . labels_in_config :
print ( label + ' label not found in project config.' )
continue
results . append ({
'id' : str ( id ), # 必须为 str,否则前端不显示
'from_name' : self . from_name ,
'to_name' : self . to_name ,
'type' : 'rectanglelabels' ,
'value' : {
'rectanglelabels' : [ label ],
'x' : bbox [ 0 ] / w * 100 , # xy 为左上角坐标点
'y' : bbox [ 1 ] / h * 100 ,
'width' : ( bbox [ 2 ] - bbox [ 0 ]) / w * 100 , # width,height 为宽高
'height' : ( bbox [ 3 ] - bbox [ 1 ]) / h * 100
},
'score' : float ( bbox [ 4 ] * 100 )
})
avgs = bboxes [:, - 1 ]
results = [{ 'result' : results , 'score' : np . average ( avgs ) * 100 }]
return results
完成其中的 gen_train_data 方法,以获取标记完成的数据用来训练(非必须,其实 label studio 自带此类方法,但在实践过程中有各种问题,所以自己写了一遍):
 1
 2
 3
 4
 5
 6
 7
 8
 9
10
11
12
13
14
15
16
17
18
19
20
21
def gen_train_data ( self , project_id ):
import zipfile
import glob
download_url = f ' { HOSTNAME . rstrip ( "/" ) } /api/projects/ { project_id } /export?export_type=COCO&download_all_tasks=false&download_resources=true'
response = requests . get ( download_url , headers = { 'Authorization' : f 'Token { API_KEY } ' })
zip_path = os . path . join ( conf [ 'workdir' ], "train.zip" )
train_path = os . path . join ( conf [ 'workdir' ], "train" )
with open ( zip_path , 'wb' ) as file :
file . write ( response . content ) # 通过二进制写文件的方式保存获取的内容
file . flush ()
f = zipfile . ZipFile ( zip_path ) # 创建压缩包对象
f . extractall ( train_path ) # 压缩包解压缩
f . close ()
os . remove ( zip_path )
if not os . path . exists ( os . path . join ( train_path , "images" , str ( project_id ))):
os . makedirs ( os . path . join ( train_path , "images" , str ( project_id )))
for img in glob . glob ( os . path . join ( train_path , "images" , "*.jpg" )):
basename = os . path . basename ( img )
shutil . move ( img , os . path . join ( train_path , "images" , str ( project_id ), basename ))
return True
完成其中的 fit 方法,以实现预标记模型的自训练功能(非必须):
 1
 2
 3
 4
 5
 6
 7
 8
 9
10
11
12
13
14
15
16
17
18
19
20
21
22
23
24
25
26
27
28
29
30
31
32
33
34
35
36
def fit ( self , completions , num_epochs = 5 , ** kwargs ):
if completions : # 使用方法1获取 project_id
image_urls , image_labels = [], []
for completion in completions :
project_id = completion [ 'project' ]
u = completion [ 'data' ][ self . value ]
image_urls . append ( get_local_path ( u , hostname = HOSTNAME , access_token = API_KEY ))
image_labels . append ( completion [ 'annotations' ][ 0 ][ 'result' ][ 0 ][ 'value' ])
elif kwargs . get ( 'data' ): # 使用方法2获取 project_id
project_id = kwargs [ 'data' ][ 'project' ][ 'id' ]
if not self . parsed_label_config :
self . load_config ( kwargs [ 'data' ][ 'project' ][ 'label_config' ])
if self . gen_train_data ( project_id ):
# 使用 mmdetection 的方法训练模型
from tools.mytrain import MyDict , train
args = MyDict ()
args . config = conf [ 'config_file' ]
data_root = os . path . join ( conf [ 'workdir' ], "train" )
args . cfg_options = {}
args . cfg_options [ 'data_root' ] = data_root
args . cfg_options [ 'runner' ] = dict ( type = 'EpochBasedRunner' , max_epochs = num_epochs )
args . cfg_options [ 'data' ] = dict (
train = dict ( img_prefix = data_root , ann_file = data_root + '/result.json' ),
val = dict ( img_prefix = data_root , ann_file = data_root + '/result.json' ),
test = dict ( img_prefix = data_root , ann_file = data_root + '/result.json' ),
)
args . cfg_options [ 'load_from' ] = conf [ 'checkpoint_file' ]
args . work_dir = os . path . join ( data_root , "work_dir" )
train ( args )
checkpoint_name = time . strftime ( "%Y%m %d %H%M%S" , time . localtime ( time . time ())) + ".pth"
shutil . copy ( os . path . join ( args . work_dir , "latest.pth" ), os . path . join ( conf [ 'workdir' ], checkpoint_name ))
print ( "model train complete!" )
# 权重文件保存至运行环境,将在下次运行 init 初始化时加载
return { 'model_path' : os . path . join ( conf [ 'workdir' ], checkpoint_name )}
else :
raise "gen_train_data error"
上述完整代码如下:
  1
  2
  3
  4
  5
  6
  7
  8
  9
 10
 11
 12
 13
 14
 15
 16
 17
 18
 19
 20
 21
 22
 23
 24
 25
 26
 27
 28
 29
 30
 31
 32
 33
 34
 35
 36
 37
 38
 39
 40
 41
 42
 43
 44
 45
 46
 47
 48
 49
 50
 51
 52
 53
 54
 55
 56
 57
 58
 59
 60
 61
 62
 63
 64
 65
 66
 67
 68
 69
 70
 71
 72
 73
 74
 75
 76
 77
 78
 79
 80
 81
 82
 83
 84
 85
 86
 87
 88
 89
 90
 91
 92
 93
 94
 95
 96
 97
 98
 99
100
101
102
103
104
105
106
107
108
109
110
111
112
113
114
115
116
117
118
119
120
121
122
123
124
125
126
127
128
129
130
131
132
133
134
135
136
137
138
139
140
141
142
143
144
145
146
147
import os
import yaml
import time
import shutil
import requests
import numpy as np
from label_studio_ml.model import LabelStudioMLBase
from label_studio_ml.utils import get_image_size , get_single_tag_keys
from label_studio_tools.core.utils.io import get_local_path
from label_studio_ml.utils import get_env
from mmdet.apis import init_detector , inference_detector
import mmcv
ROOT = os . path . join ( os . path . dirname ( __file__ ))
print ( '=> ROOT = ' , ROOT )
os . environ [ 'HOSTNAME' ] = 'http://localhost:80'
os . environ [ 'API_KEY' ] = '37edbb42f1b3a73376548ea6c4bc7b3805d63453'
HOSTNAME = get_env ( 'HOSTNAME' )
API_KEY = get_env ( 'API_KEY' )
print ( '=> LABEL STUDIO HOSTNAME = ' , HOSTNAME )
if not API_KEY :
print ( '=> WARNING! API_KEY is not set' )
with open ( os . path . join ( ROOT , "conf.yaml" ), errors = 'ignore' ) as f :
conf = yaml . safe_load ( f )
class MyModel ( LabelStudioMLBase ):
def __init__ ( self , ** kwargs ):
super ( MyModel , self ) . __init__ ( ** kwargs )
# 按 mmdetection 的方式加载模型及权重
if self . train_output :
self . detector = init_detector ( conf [ 'config_file' ], self . train_output [ 'model_path' ], device = conf [ 'device' ])
else :
self . detector = init_detector ( conf [ 'config_file' ], conf [ 'checkpoint_file' ], device = conf [ 'device' ])
# 获取后端模型标签列表
self . CLASSES = self . detector . CLASSES
# 前端配置的标签列表
self . labels_in_config = set ( self . labels_in_config )
# 一些项目相关常量
self . from_name , self . to_name , self . value , self . labels_in_config = get_single_tag_keys ( self . parsed_label_config , 'RectangleLabels' , 'Image' ) # 前端获取任务属性
def predict ( self , tasks , ** kwargs ):
# 获取待标记图片
images = [ get_local_path ( task [ 'data' ][ self . value ], hostname = HOSTNAME , access_token = API_KEY ) for task in tasks ]
for image_path in images :
w , h = get_image_size ( image_path )
# 推理演示图像
img = mmcv . imread ( image_path )
# 以 mmdetection 的方法进行推理
result = inference_detector ( self . detector , img )
# 手动获取标记框位置
bboxes = np . vstack ( result )
# 手动获取推理结果标签
labels = [ np . full ( bbox . shape [ 0 ], i , dtype = np . int32 ) for i , bbox in enumerate ( result )]
labels = np . concatenate ( labels )
# 推理分数 FCOS算法结果会多出来两个分数极低的检测框,需要将其过滤掉
scores = bboxes [:, - 1 ]
score_thr = 0.3
inds = scores > score_thr
bboxes = bboxes [ inds , :]
labels = labels [ inds ]
results = [] # results需要放在list中再返回
for id , bbox in enumerate ( bboxes ):
label = self . CLASSES [ labels [ id ]]
if label not in self . labels_in_config :
print ( label + ' label not found in project config.' )
continue
results . append ({
'id' : str ( id ), # 必须为 str,否则前端不显示
'from_name' : self . from_name ,
'to_name' : self . to_name ,
'type' : 'rectanglelabels' ,
'value' : {
'rectanglelabels' : [ label ],
'x' : bbox [ 0 ] / w * 100 , # xy 为左上角坐标点
'y' : bbox [ 1 ] / h * 100 ,
'width' : ( bbox [ 2 ] - bbox [ 0 ]) / w * 100 , # width,height 为宽高
'height' : ( bbox [ 3 ] - bbox [ 1 ]) / h * 100
},
'score' : float ( bbox [ 4 ] * 100 )
})
avgs = bboxes [:, - 1 ]
results = [{ 'result' : results , 'score' : np . average ( avgs ) * 100 }]
return results
def fit ( self , completions , num_epochs = 5 , ** kwargs ):
if completions : # 使用方法1获取 project_id
image_urls , image_labels = [], []
for completion in completions :
project_id = completion [ 'project' ]
u = completion [ 'data' ][ self . value ]
image_urls . append ( get_local_path ( u , hostname = HOSTNAME , access_token = API_KEY ))
image_labels . append ( completion [ 'annotations' ][ 0 ][ 'result' ][ 0 ][ 'value' ])
elif kwargs . get ( 'data' ): # 使用方法2获取 project_id
project_id = kwargs [ 'data' ][ 'project' ][ 'id' ]
if not self . parsed_label_config :
self . load_config ( kwargs [ 'data' ][ 'project' ][ 'label_config' ])
if self . gen_train_data ( project_id ):
# 使用 mmdetection 的方法训练模型
from tools.mytrain import MyDict , train
args = MyDict ()
args . config = conf [ 'config_file' ]
data_root = os . path . join ( conf [ 'workdir' ], "train" )
args . cfg_options = {}
args . cfg_options [ 'data_root' ] = data_root
args . cfg_options [ 'runner' ] = dict ( type = 'EpochBasedRunner' , max_epochs = num_epochs )
args . cfg_options [ 'data' ] = dict (
train = dict ( img_prefix = data_root , ann_file = data_root + '/result.json' ),
val = dict ( img_prefix = data_root , ann_file = data_root + '/result.json' ),
test = dict ( img_prefix = data_root , ann_file = data_root + '/result.json' ),
)
args . cfg_options [ 'load_from' ] = conf [ 'checkpoint_file' ]
args . work_dir = os . path . join ( data_root , "work_dir" )
train ( args )
checkpoint_name = time . strftime ( "%Y%m %d %H%M%S" , time . localtime ( time . time ())) + ".pth"
shutil . copy ( os . path . join ( args . work_dir , "latest.pth" ), os . path . join ( conf [ 'workdir' ], checkpoint_name ))
print ( "model train complete!" )
# 权重文件保存至运行环境,将在下次运行 init 初始化时加载
return { 'model_path' : os . path . join ( conf [ 'workdir' ], checkpoint_name )}
else :
raise "gen_train_data error"
def gen_train_data ( self , project_id ):
import zipfile
import glob
download_url = f ' { HOSTNAME . rstrip ( "/" ) } /api/projects/ { project_id } /export?export_type=COCO&download_all_tasks=false&download_resources=true'
response = requests . get ( download_url , headers = { 'Authorization' : f 'Token { API_KEY } ' })
zip_path = os . path . join ( conf [ 'workdir' ], "train.zip" )
train_path = os . path . join ( conf [ 'workdir' ], "train" )
with open ( zip_path , 'wb' ) as file :
file . write ( response . content ) # 通过二进制写文件的方式保存获取的内容
file . flush ()
f = zipfile . ZipFile ( zip_path ) # 创建压缩包对象
f . extractall ( train_path ) # 压缩包解压缩
f . close ()
os . remove ( zip_path )
if not os . path . exists ( os . path . join ( train_path , "images" , str ( project_id ))):
os . makedirs ( os . path . join ( train_path , "images" , str ( project_id )))
for img in glob . glob ( os . path . join ( train_path , "images" , "*.jpg" )):
basename = os . path . basename ( img )
shutil . move ( img , os . path . join ( train_path , "images" , str ( project_id ), basename ))
return True
启动后端服务
以下命令为 window 脚本,皆在 backend 根目录下执行。
根据后端模型生成服务代码
1
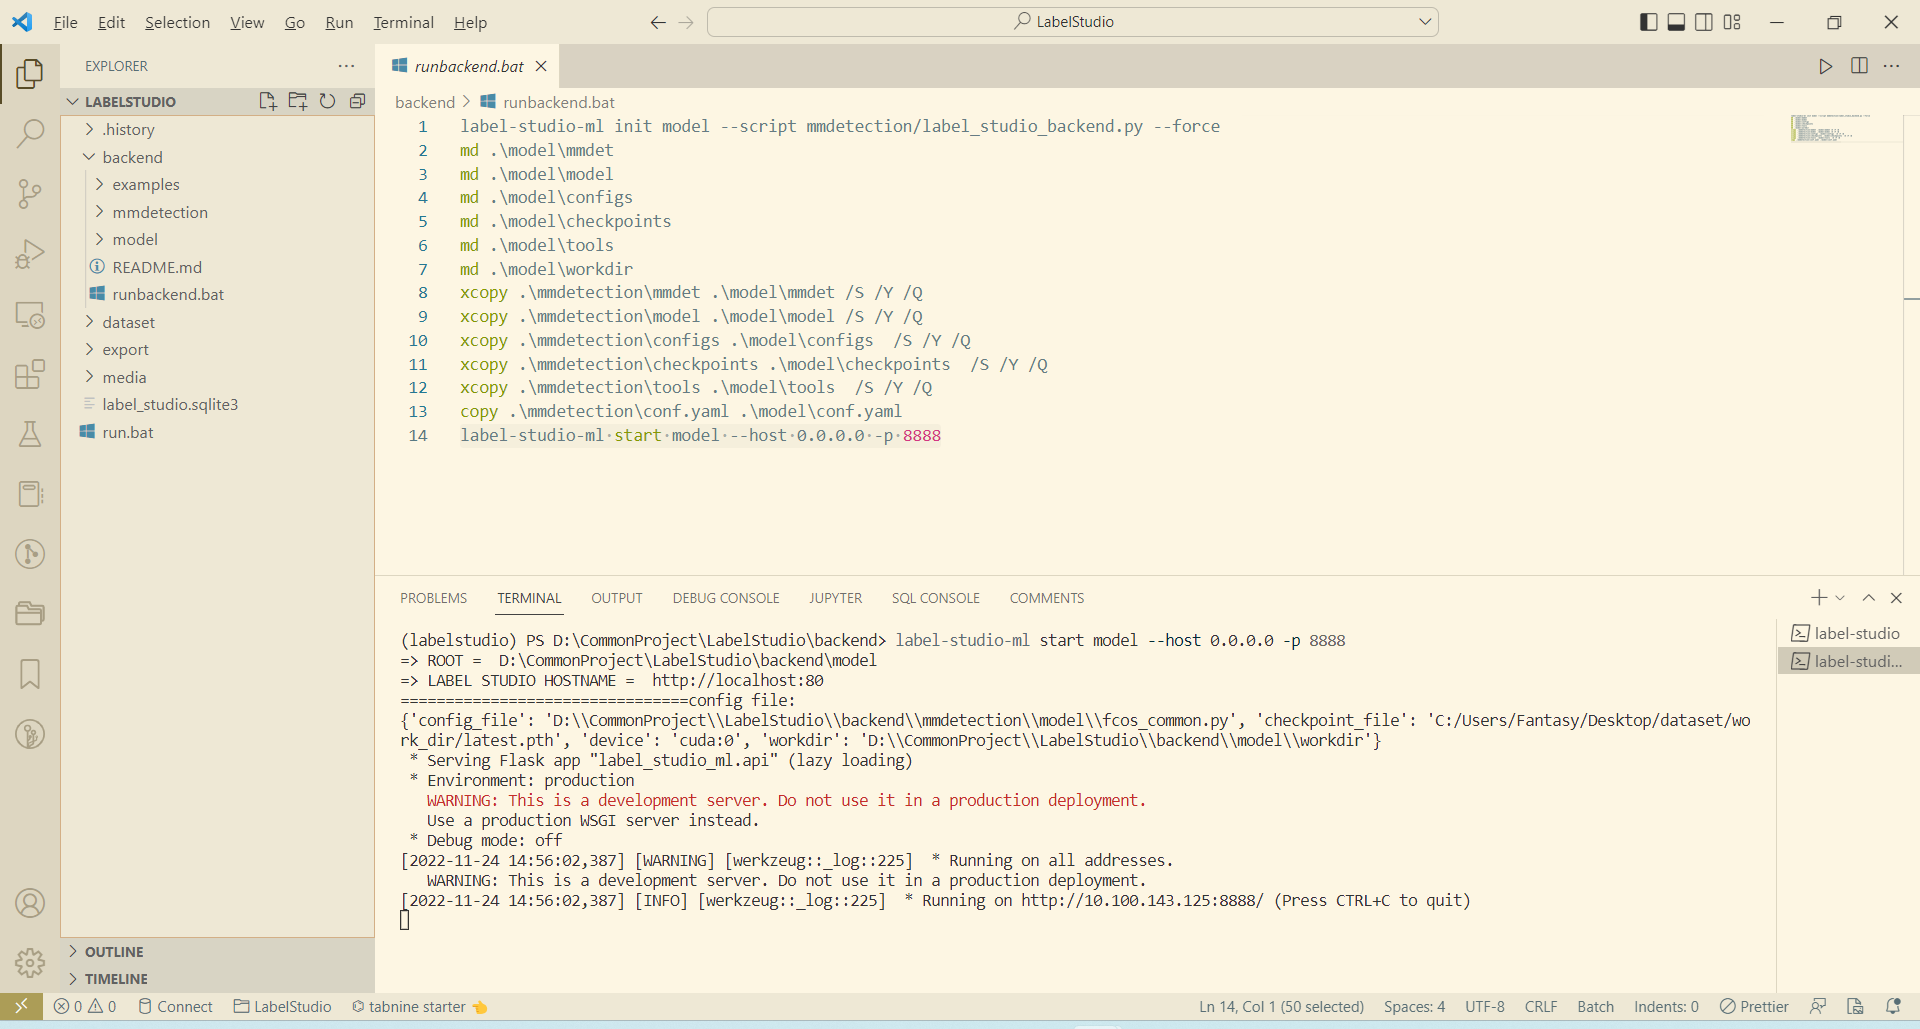
label-studio-ml init model --script mmdetection/label_studio_backend.py --force
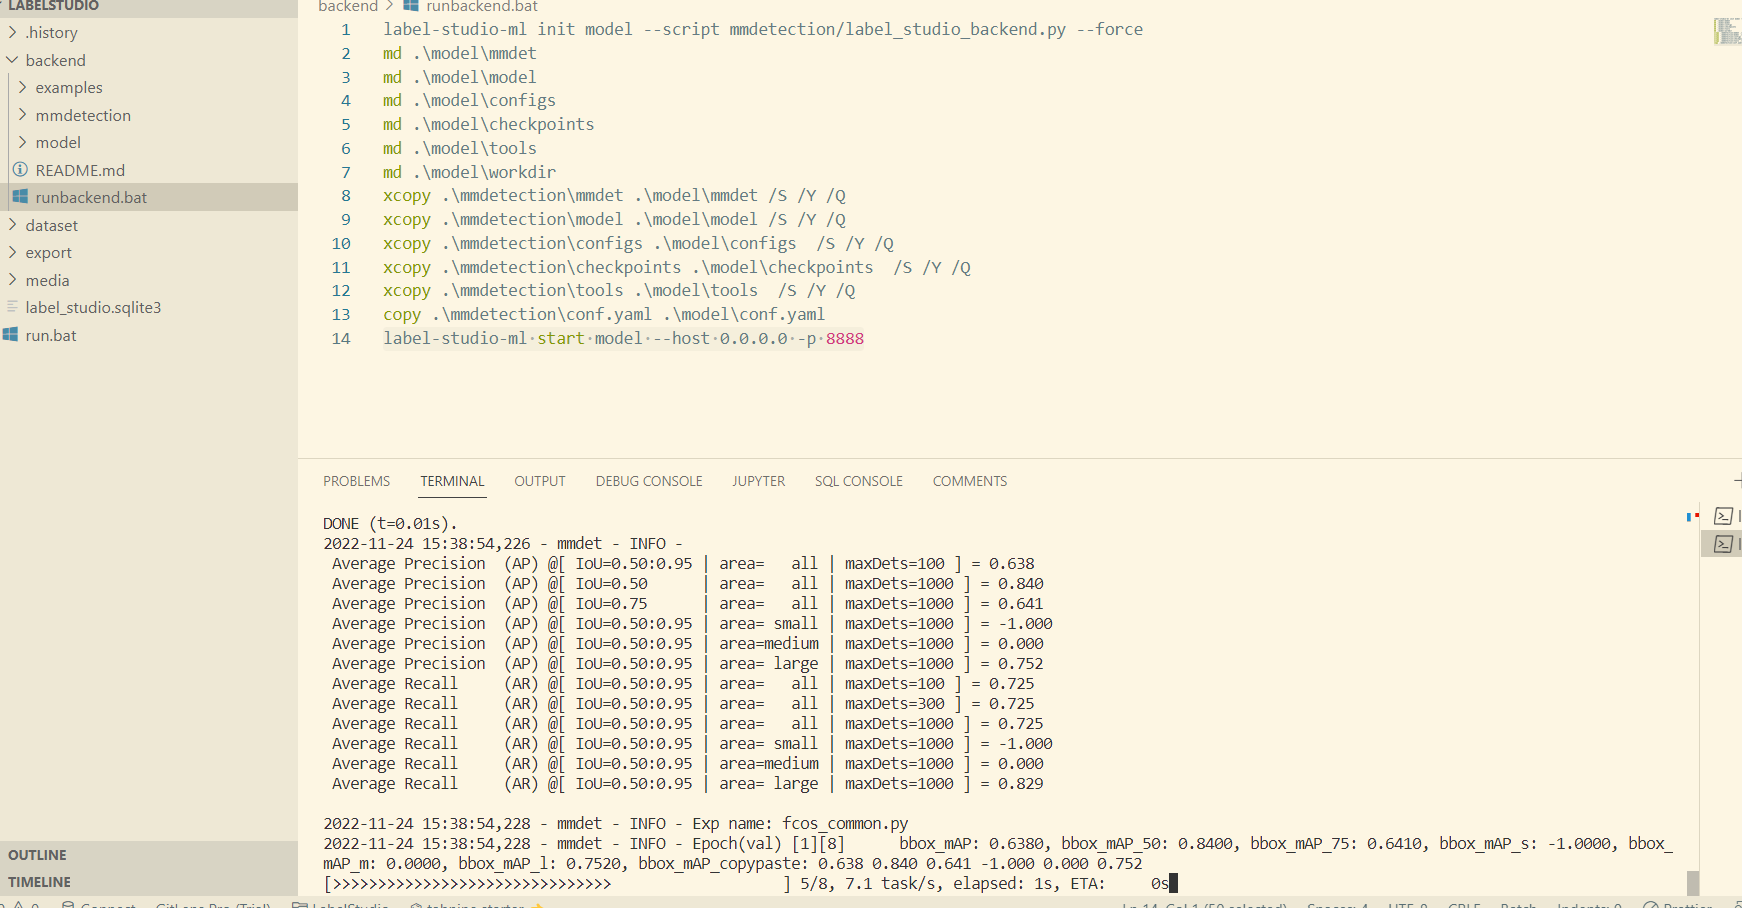
label-studio-ml init 命令提供了一种根据后端模型自动生成后端服务代码的功能, model 为输出目录, --script 指定后端模型路径, --force 表示覆盖生成。该命令执行成功后会在 backend 目录下生成 model 目录。
 1
 2
 3
 4
 5
 6
 7
 8
 9
10
11
12
md .\model\mmdet
md .\model\model
md .\model\configs
md .\model\checkpoints
md .\model\tools
md .\model\workdir
xcopy .\mmdetection\mmdet .\model\mmdet /S /Y /Q
xcopy .\mmdetection\model .\model\model /S /Y /Q
xcopy .\mmdetection\configs .\model\configs  /S /Y /Q
xcopy .\mmdetection\checkpoints .\model\checkpoints  /S /Y /Q
xcopy .\mmdetection\tools .\model\tools  /S /Y /Q
copy .\mmdetection\conf.yaml .\model\conf.yaml
启动后端服务
1
label-studio-ml start model --host 0.0.0.0 -p 8888
启动成功后效果如下:
启动后端服务
前端自动标注
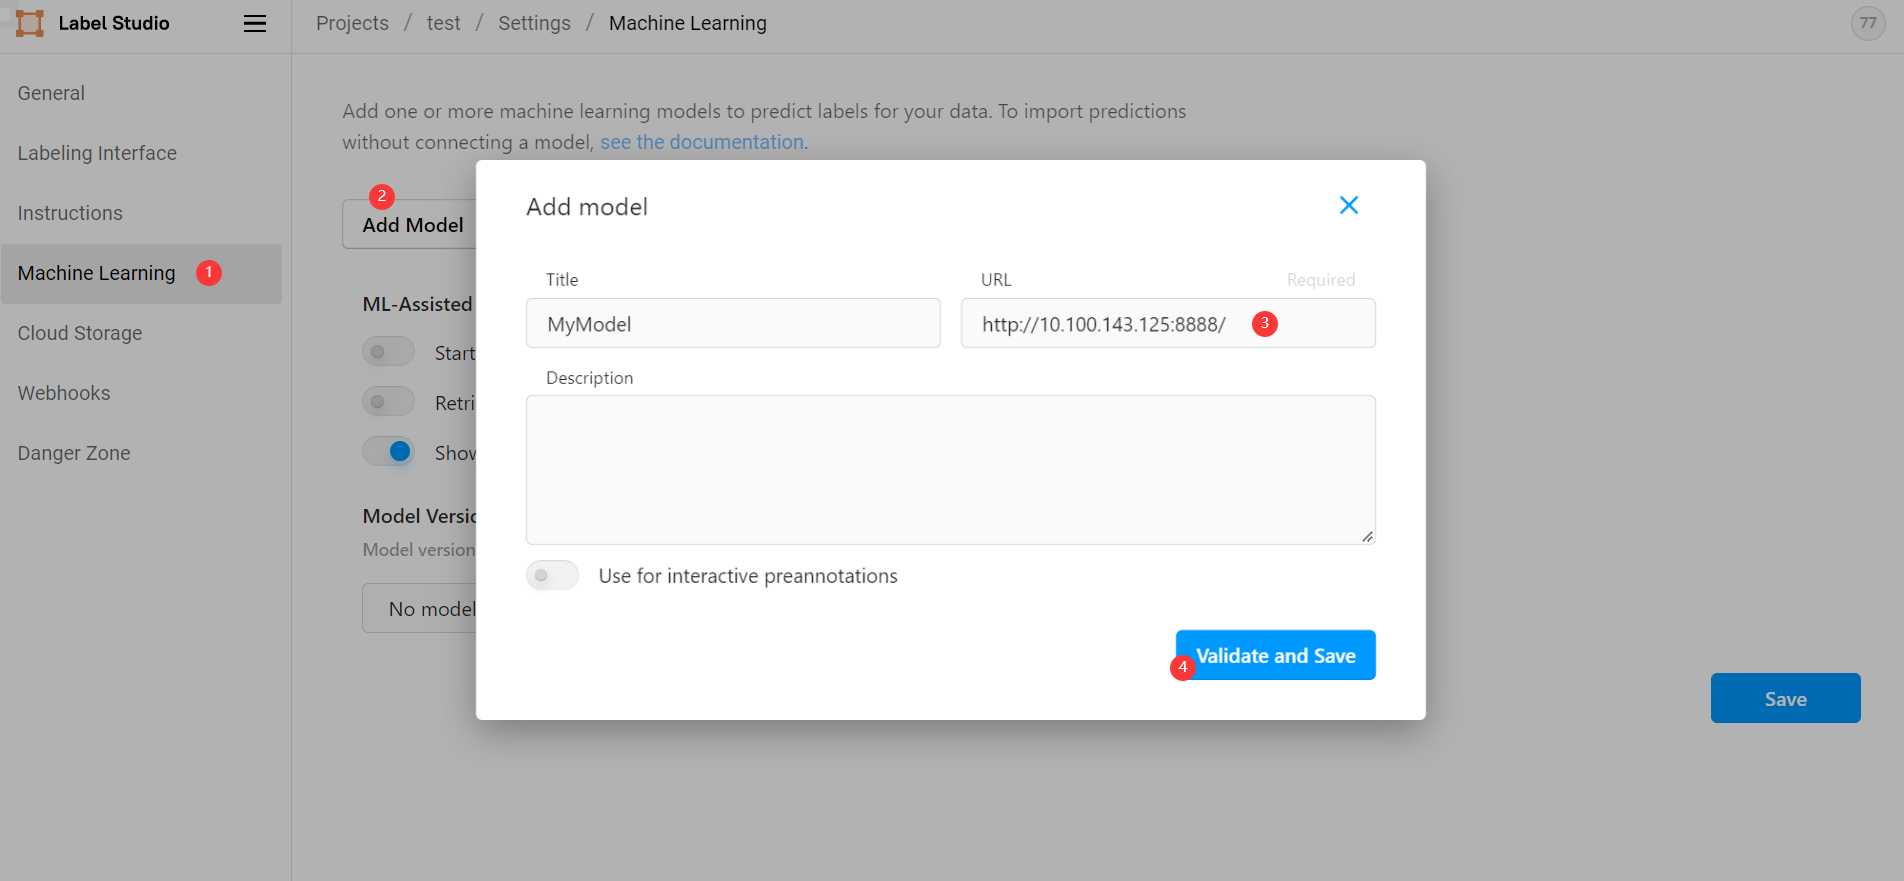
前面我们已经能够从 label studio 前端正常手动标注图片,要想实现自动标注,则需要在前端引入后端服务。在我们创建的项目中依次选择 Settings ->
Machine Learning -> Add model ,然后输入后端地址 http://10.100.143.125:8888/ 点击保存(此地址为命令行打印地址,而非 http://127.0.0.1:8888/ ):
Add model
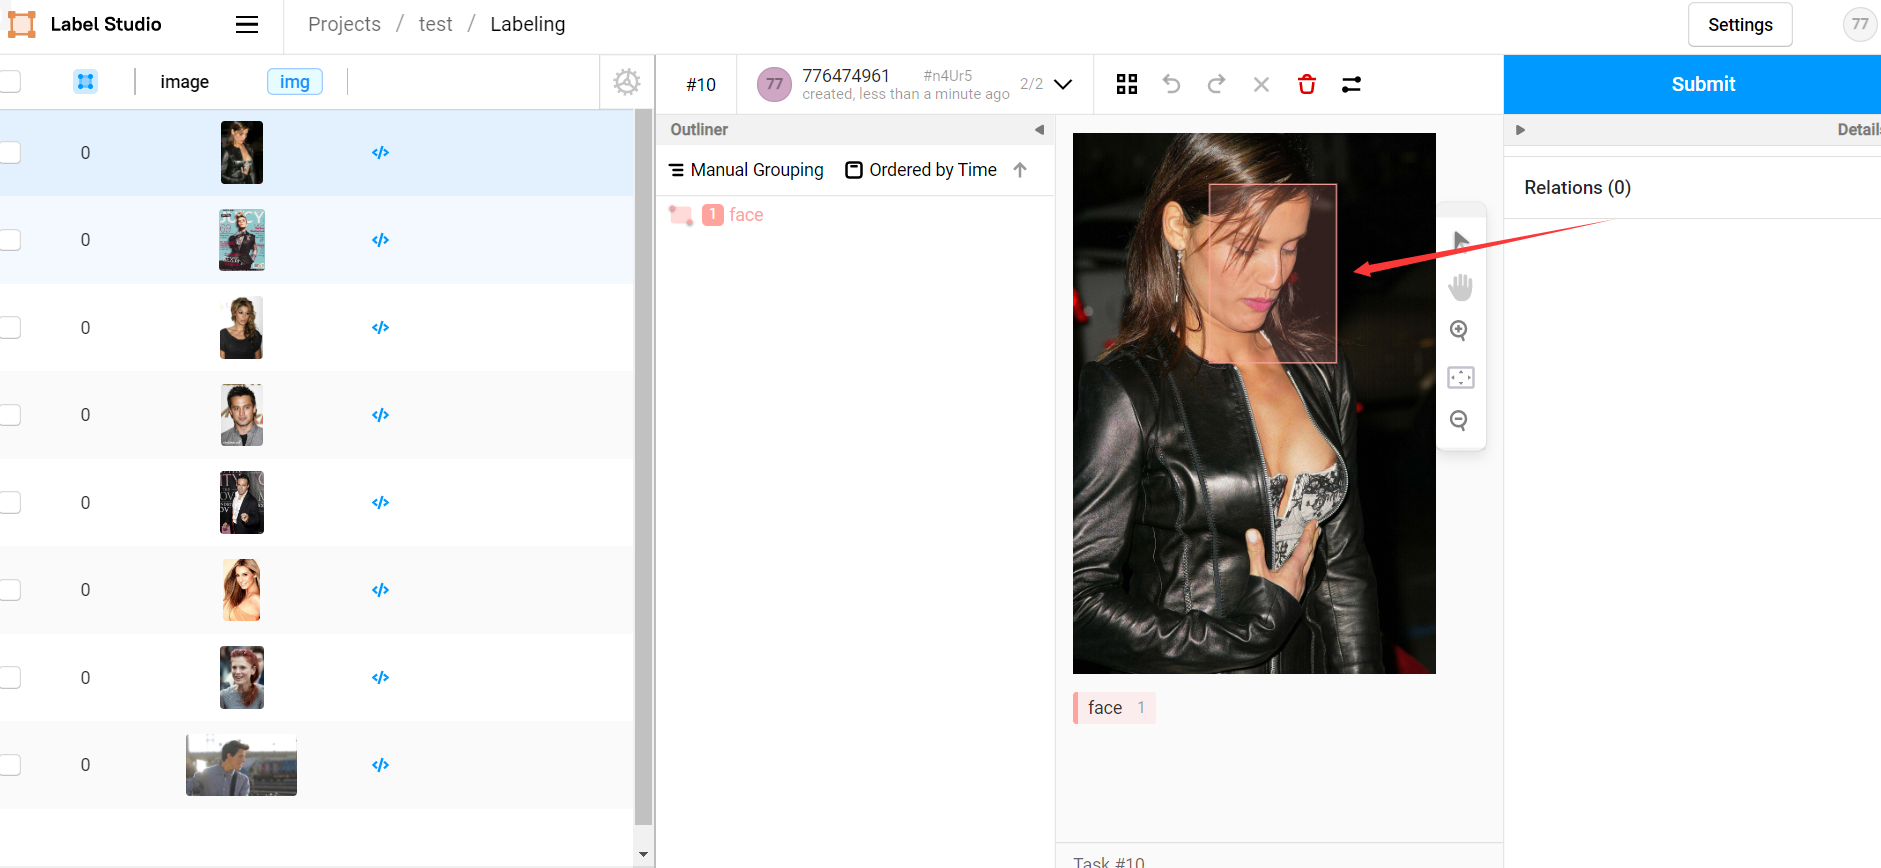
predict 方法),等待片刻后即可看见预标记结果,我们只需要大致核对无误后点击 submit 即可:
前端自动标注
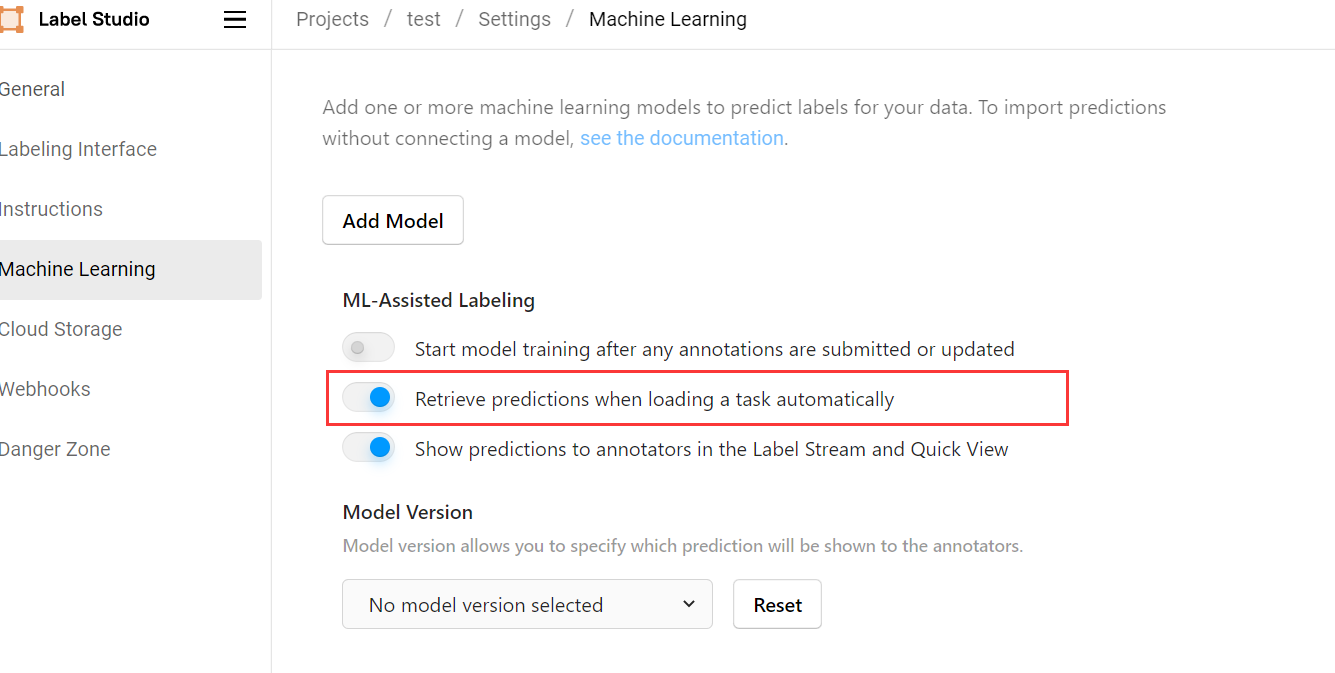
Retrieve predictions when loading a task automatically ,此后前端会在我们每次打开项目时自动对所有任务进行自动预测,基本能够做到无等待:
Retrieve predictions when loading a task automatically
后端自动训练
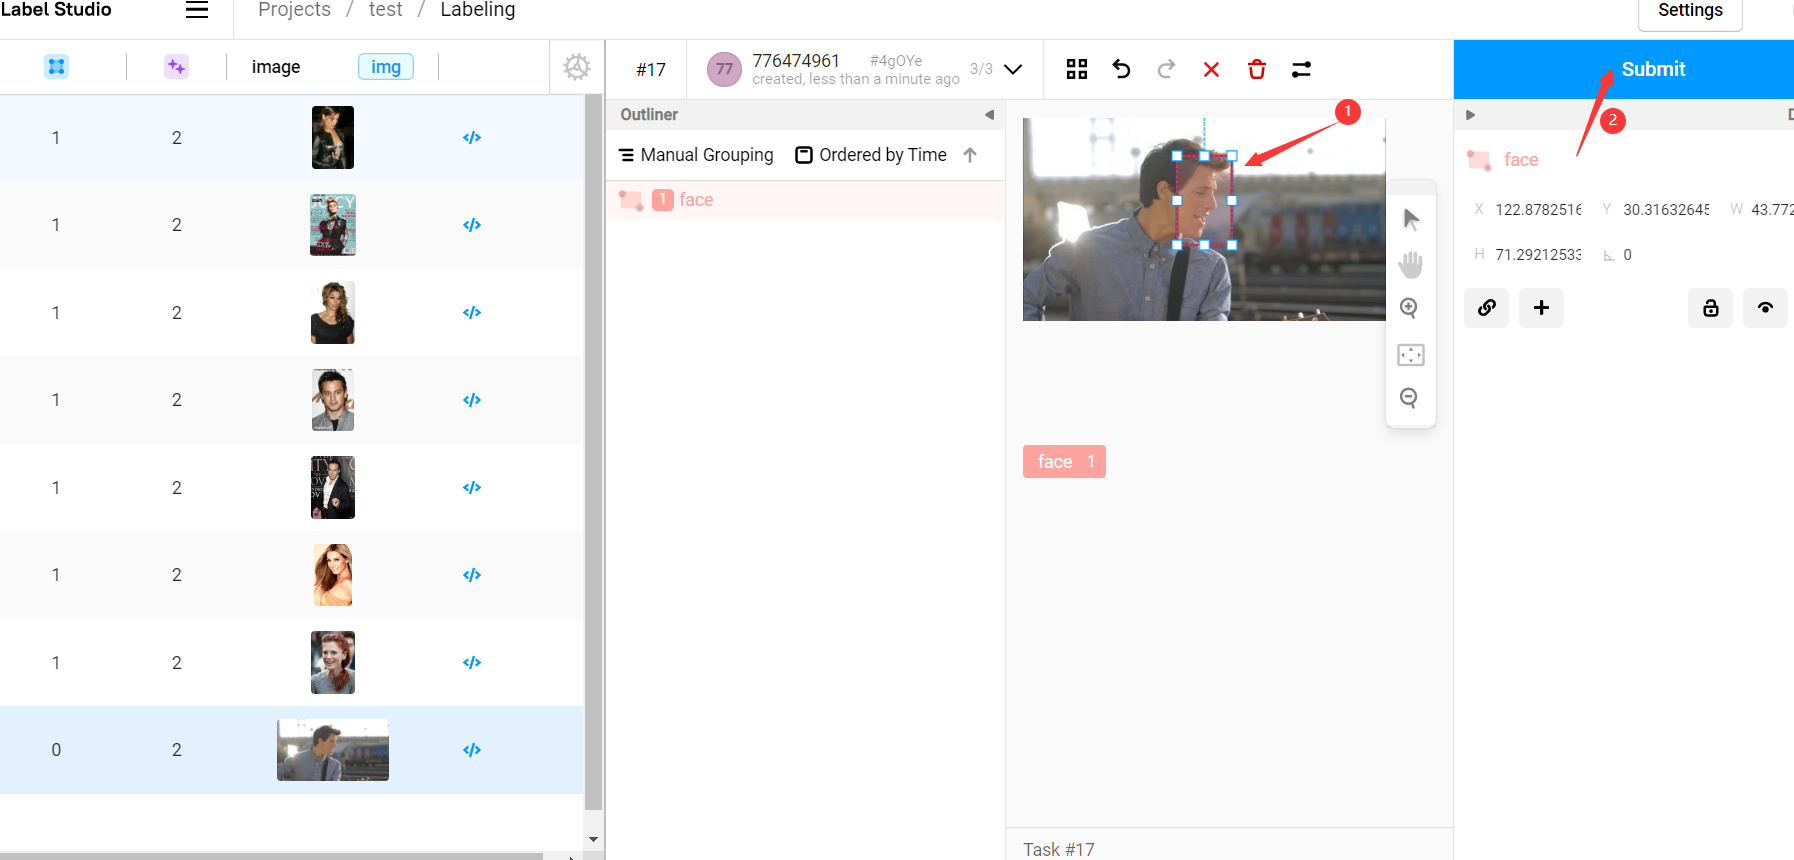
现在所有的图片都已经有了与标注信息,我们先检查所有图片,检查并改进所有标注信息然后点击 submit 提交:
提交标注
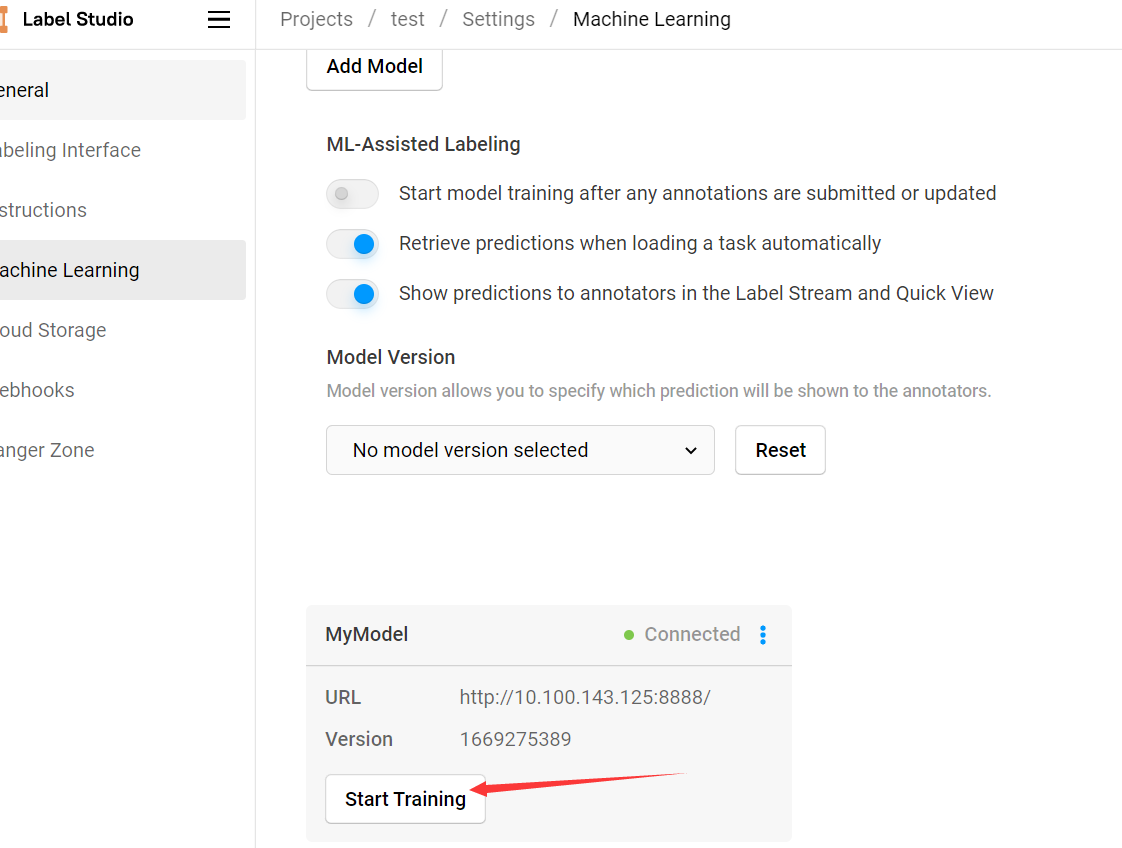
Start Training
fit 方法对模型进行训练,可以在后端命令行界面看见训练过程,训练完成后的所有新数据集都会使用新的模型进行预测:
自动训练
部分常见问题
Q: 一种访问权限不允许的方式做了一个访问套接字的尝试。
Q: Can’t connect to ML backend http://127.0.0.1:8888/, health check failed. Make sure it is up and your firewall is properly configured.
Q: FileNotFoundError: Can’t resolve url, neither hostname or project_dir passed: /data/upload/1/db8f065a-000001.jpg
Q: UnicodeEncodeError: ‘gbk’ codec can’t encode character ‘\xa0’ in position 2: illegal multibyte sequenceinit _.py#line 179 为:
1
2
for chunk in iterable :
fp . write ( chunk . replace ( u ' \xa0 ' , u '' ))
参考
